Welcome to the ServiceBell setup guide for sales reps! ServiceBell turns your website visitors into opportunities in record timing, with live chat and video conversations right on your website.
If you’re a sales rep, follow the steps below so you’re ready to rock and roll with ServiceBell.
Complete Your Profile
First, create your new ServiceBell account. Find the email from daniel@servicebell.com and Join the team. Once logged in, click the Settings icon in the bottom left of your dashboard. You’ll open the Account tab by default.

Next, fill out your name, job title, and add your profile picture. You can also change your email and password from the Account tab.
Lastly, let’s make sure your camera and microphone are working properly.
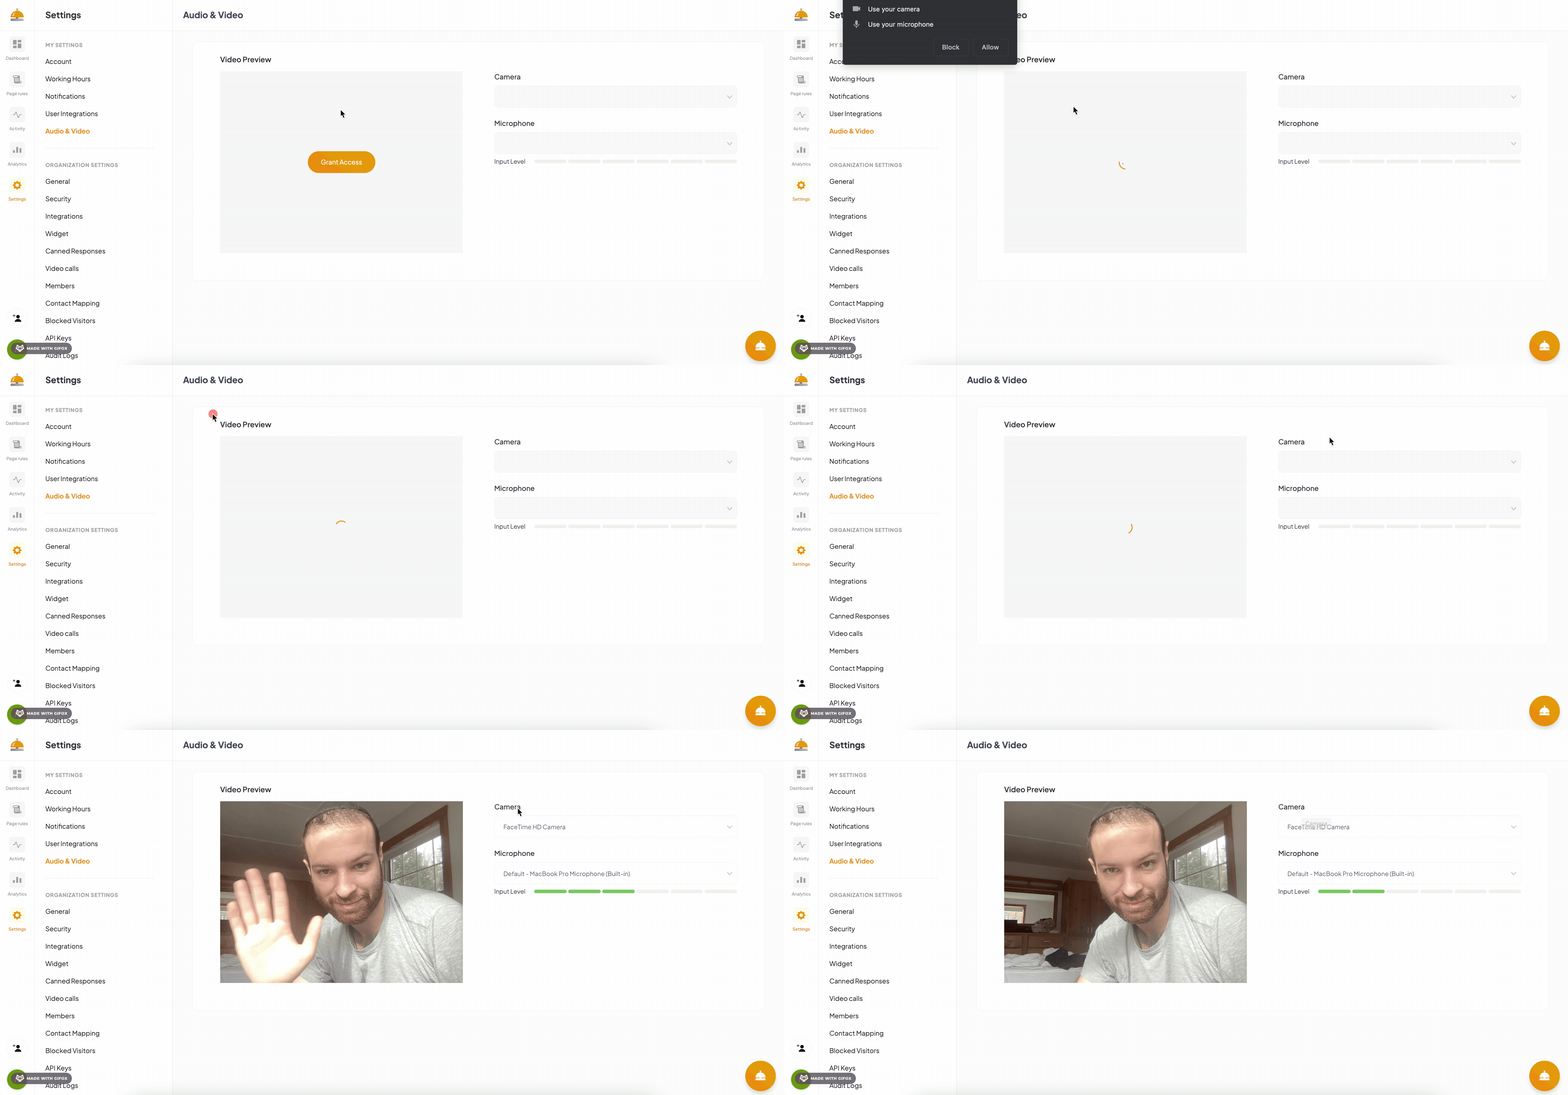
Navigate to Settings > Audio & Video.

“Grant Access” to enable video and audio permissions. When prompted by your browser, “Allow” ServiceBell to access your camera and your microphone.
You should see yourself pop up in the “Video Preview” box after accepting. If nothing appears, you may need to change your camera and microphone settings.

On the right of the Video Preview window, select the “Camera” and Microphone dropdown to select your preferred video/audio devices.

Make sure your video shows in the “Video Preview” window and you see the audio “Input Level” bars popping up.
Otherwise, customers may not see or hear you on a live call.
Configure Alerts
ServiceBell sends realtime alerts so reps can pounce on VIP website visitors, and answer inbound requests. Make sure to follow these instructions carefully, so you don’t miss calls or opportunities to pounce on hot prospects.
Browser Alerts
First, navigate to Settings > Notifications and click “Enable push notifications.”

When prompted by your browser to enable notification permissions, click “Allow.”

You’ll see a confirmation box pop up that looks like this:

The test notification (on Google Chrome) looks like this:

If you don't get a test notification after enabling them, make sure your operating system allows notifications from your browser with the steps in our Notifications setup guide.
Slack Alerts
Once your ServiceBell administrator invites you to your ServiceBell Slack channel(s), you’ll start receiving Slack notifications.

If you don’t see Slack alert banners popping up on your screen, make sure your operating system allows notifications from Slack with the steps in our Notifications setup guide.
Microsoft Teams Alerts
Once your ServiceBell administrator invites you to your Microsoft Teams ServiceBell channel(s), you’ll start receiving Teams notifications.
If you don’t see Teams alert banners popping up on your screen, make sure your operating system allows notifications from Slack with the steps in our Notifications setup guide.
Configure Hours of Availability
Once your profile is complete, you’ll want to configure hours of availability for ServiceBell Live Chat and Scheduling.
This way, prospects and customers can only ring you - or book a meeting - when you’re available.
First, navigate to Settings > Working Hours.

Choose the days and times when you’re generally available.

You’ll be “online” during these hours. Unless you manually toggle yourself offline or have an active Google Calendar event, website visitors can ring you from ServiceBell’s widget. Make sure you’re available during these hours, so you don’t miss chats or calls.
Speaking of Google Calendar, ServiceBell’s Google Calendar integration automatically toggles you offline when in a meeting, so you never miss a call.
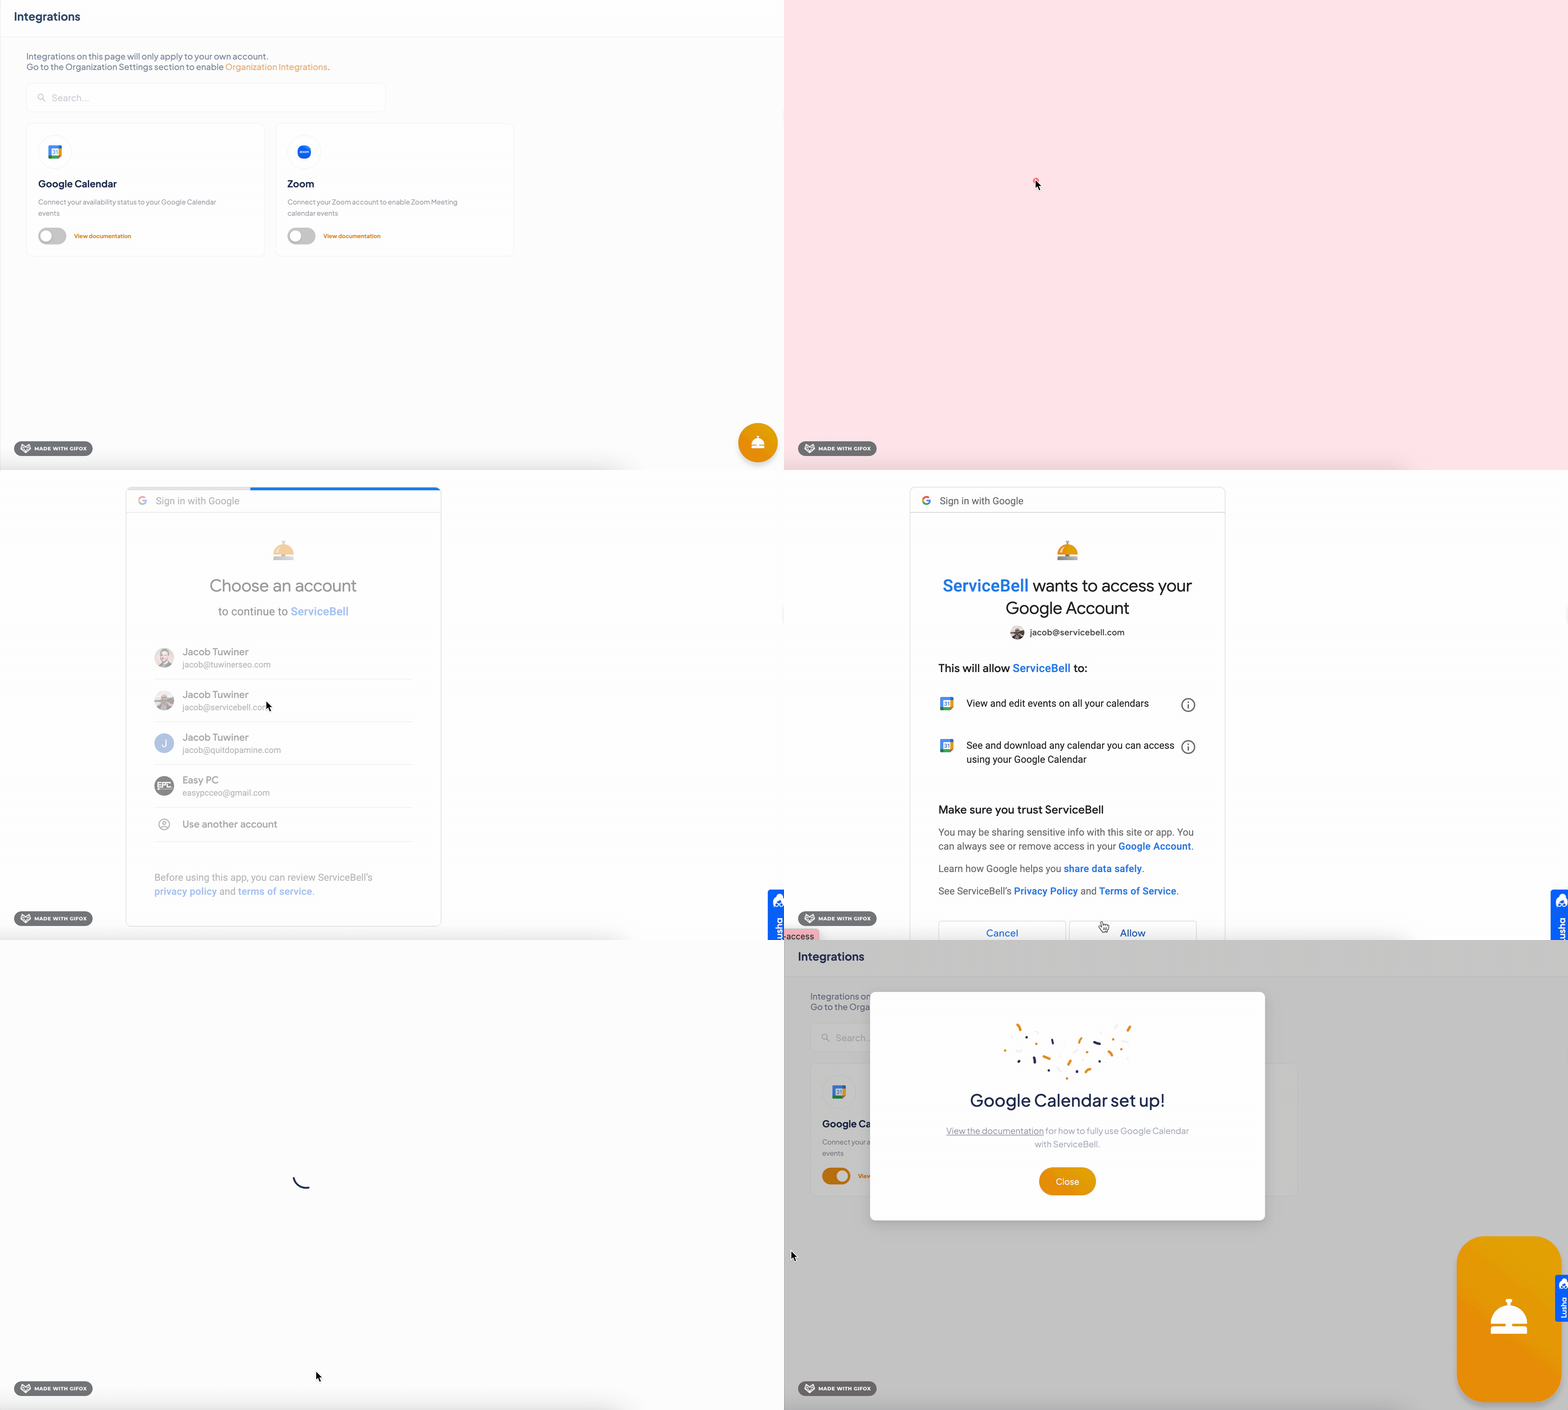
Let’s connect your calendar to ServiceBell. Navigate to Settings > User Integrations toggle on the “Google Calendar” integration.
You’ll see an O-auth prompt pop-up. Click “Sign in with Google” and choose your account. Allow permissions, and you’re all set!
